 |
The original kitchen. Don't you love the checkered vinyl floor?   
This is a view of the other side of the kitchen. To the left is the Great room. Straight through the little door, is the dining room and stairs.
We had the doorway widened to match the door from the Great Room.
Demolition Time:
The laird removed upper/ lower cabinets. Removed refrigerator & oven. Then handy Thomas helped close up the exhaust vent.
|
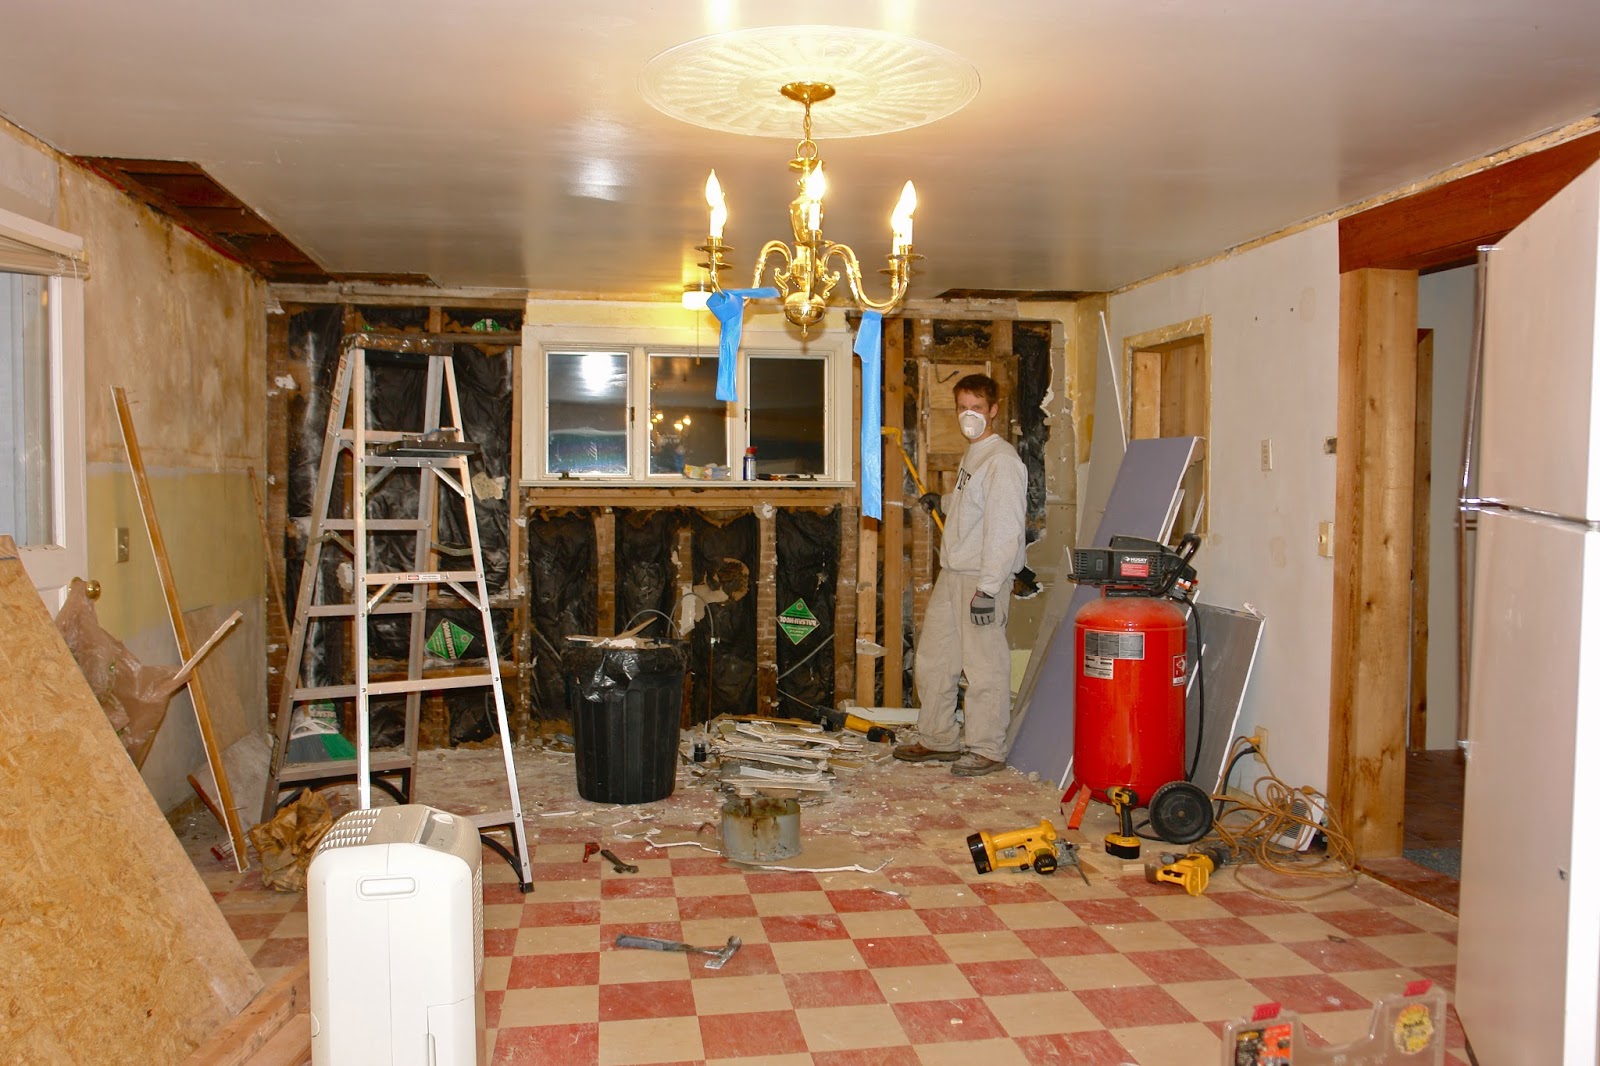 |
| One thing leads to another. With renovating old houses, you start with an original intention, that often grows into a lengthy reality- as unexpected extra projects pop up all along the way, to fix the old problems. |
 |
| This exterior wall had to be stripped down to the studs because of it's unfortunate lean outwards. In order to attach upper cabinets, this wall would need to be level. And so the demolition began, and ended with a more level wall. |
 |
| Newly insulated wall w/ 2 new electric outlets |
 |
With drywall finished, the next step was to trace a level line along the wall, as a guide for where the bottom of the upper cabinets should sit. Here they have installed the very first cabinet!
|

In the 180 years this house has been standing, this particular corner of the house had settled a few inches lower than the rest. It was necessary to level the floors. Then Trusty Jeremy assisted in installing upper cabinets and setting lower cabinets in there place. Now it's starting to look like a kitchen again.

The Omega cabinets officially installed! First coat of paint on finished walls and a working sink!

Newly installed Corian counter tops (Sahara).
Cabinet pulls & knobs installed.
Pottery Barn Light fixture installed.
Signature Hardware faucet installed.
The Laird learned how to plumb a sink from YouTube videos.
The next installment of photos will continue the process of transforming this kitchen! Another future post will feature photos highlighting details of the products chosen for our kitchen.
No comments:
Post a Comment