Thursday, September 17, 2015

Our old door got a make over


Our main entry door is pretty shabby for many reasons.  Putting money forth to purchase a brand new door is costly. Therefore, I've wanted to paint it since we moved in. In the midst of refinishing my rush chairs from craigslist, I needed to order more Everlasting white Americana Decor chalk paint & cream wax.  Amazon is pretty awesome, and my paint arrived in 2 days.  Not only did I get paint for the chairs, I bought a new (to me) color with intentions to paint our entry door as well.

Today I took a break from rushing the first of three chairs to paint the door. Check it out- it's Charcoal black now.  It would look a lot better with a new handle & lock, but that's a project for another day.
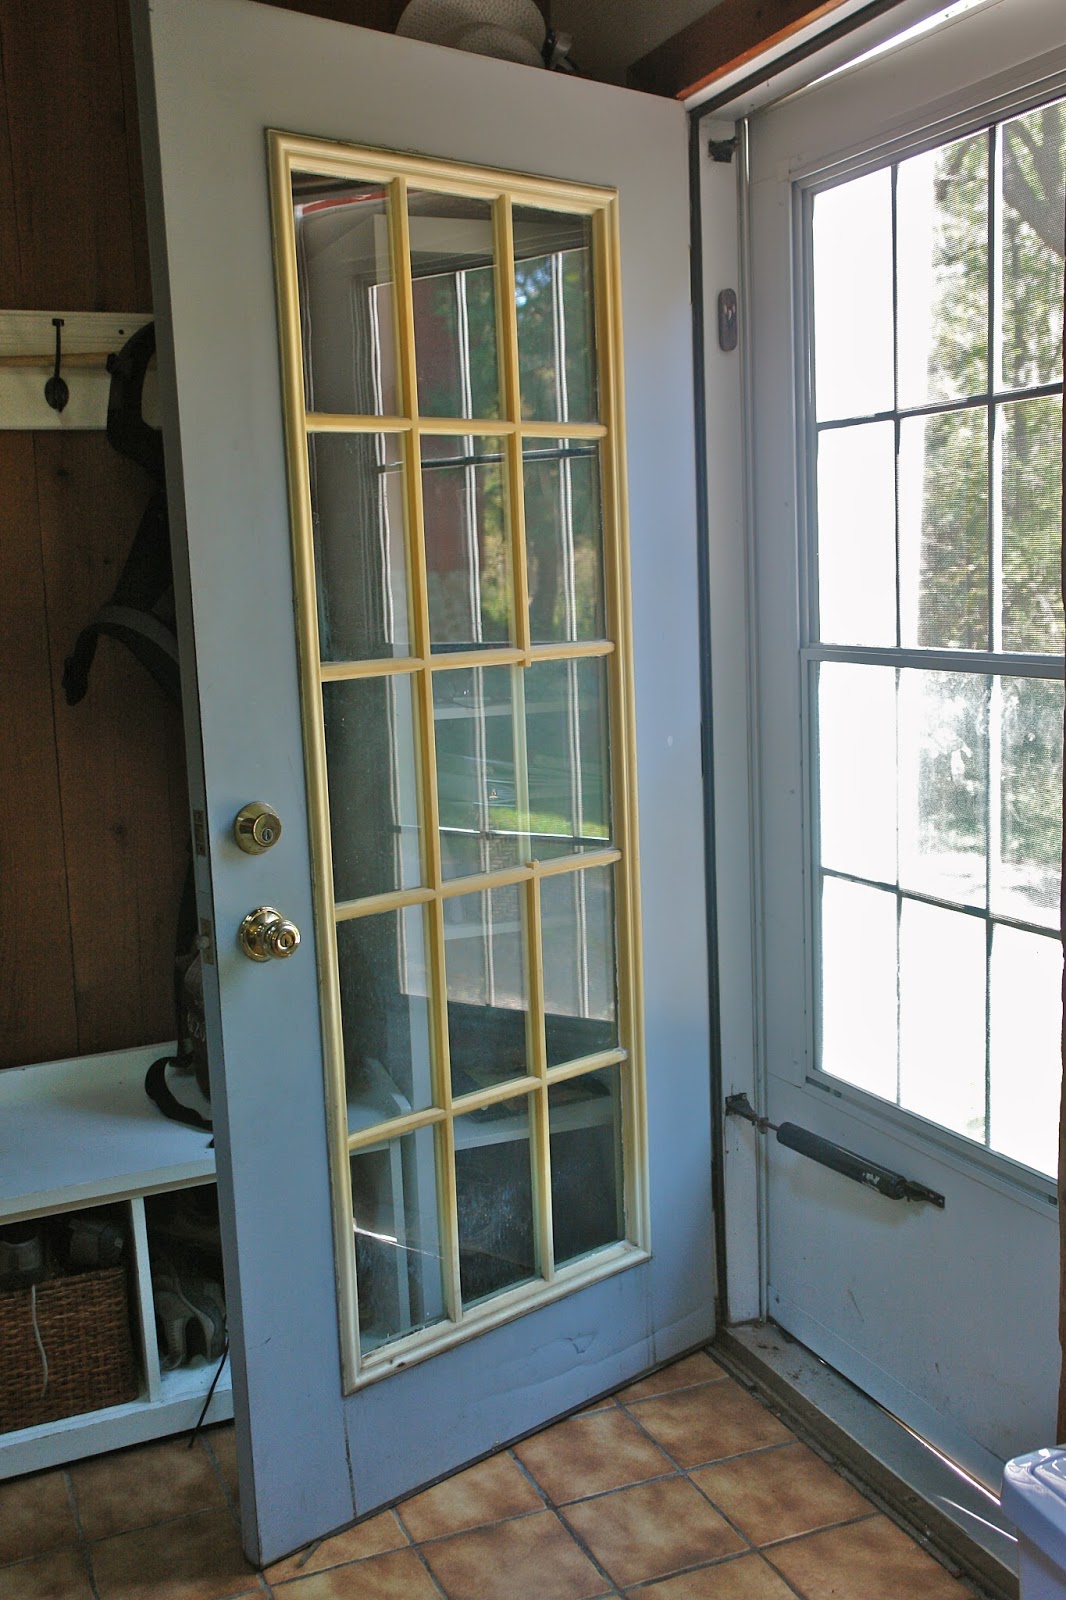
I have never painted anything black before.  It's a little scary to do because it would take a lot of paint to re-do if I didn't like it.  I love the way black chalk paint looks in all the photos I see of other people's projects.  I am pleased with how this door turned out. Though there is not much I can do about the broken bar (which looks a bit silly), overall the door looks much better. Though I, like most people would have loved a brand new door, this option was much cheaper and resourceful.  One can of chalk paint & a bit of finishing wax for less than $20.  This re-do should hopefully hold us over until the door is older and less functional and we actually "need" to buy a new door.  Wondering if I should paint the interior cross bars black to match the exterior, or leave it as is...  Any thoughts?

Tuesday, September 15, 2015

So many tomatoes!

We've had an overabundance of cherry tomatoes this season, and at this point we're getting more than we can eat and give away.  We made some salsa out of one picking that turned out pretty decent.  As I was putting some over ripe tomatoes out in the compost pile, I got the idea of sun dried tomatoes.  When I looked into how to make sun dried tomatoes, I learned that most "sun dried tomatoes" are actually dehydrated in the oven or a dehydrator.  I did find a couple blogs that explained how to do sun dried tomatoes, so I gave it a try.  First matter of importance was hot & sunny days, which we had a nice run of good, hot days recently.  First I cut our tiny cherry tomatoes into very thin slices (4).  Then I placed a piece of foil down in a pan and placed the slices in it.  I put the pan onto the dashboard of our car with the windows rolled up.  I left them there for 2 days, and then tasted.  They were quite tasty- somewhat like tomato flavored fruit snacks.  So needless to say, I checked out how much dehydrators cost and was pleasantly surprised that there are some very inexpensive ones (along with very expensive ones).  The Laird suggested that I check craigslist.  Lo and behold someone was selling a brand that usually cost between $50-$80, for a mere $25.  We settled on $22 and Redwoodshire now has a dehydrator.

Though dehydrating fruits and vegetables takes a long time, the labor involved is minimal.  It took me about 50 minutes to halve a bag of cherry tomatoes, dip them in a vinegar/water solution and place on trays.  This is much quicker than canning!  Plus it adds variety to our preserved foods.


The process took much longer than other blogs suggested.  I am not sure if it's because our dehydrator is cheap and does not have a temperature dial or if it's because I followed the recommendation of the instruction manual and left the vent open for the first 6 hours.  Once I shut the vent, progress really picked up.  I placed them in a plastic freezer bag, inside a Tupperware container and am storing them in the fridge for later snacking and use.  I am considering filling a canning jar with olive oil, garlic, fresh basil and these sun dried tomatoes as another way to flavor & preserve for meals.

Lady genevieve picked these sunflowers.  They are sitting on the window sill above my apron sink in the kitchen.  Sunflowers are one of my favorites!

Saturday, September 12, 2015

Refinishing Rush Chairs- the Lady of Redwoodshire's current project


Remember this project from a last year?  Check out my Weaving Rush Chairs post for the process.  We only have 3 of these rush seat chairs for our dining room table, so I have been on the lookout for a few more to have a full set.  Though I found ones that were similar, they were in pretty good condition and were going to cost more than what I was hoping.  I was hoping to find a good deal, considering I know how to rush chairs and can fix up ones that may be in poor condition.  

I finally found a GREAT deal!  Though the ladders and other parts of the chair are slightly different from the ones we had, it was too good of a deal to pass up.  The chairs were in fair condition, as the previous owner had spray painted them (partially because she ran out of paint?!).  She had even spray painted the rush seats, which looks like it made a mess of the chairs.  The rush was in need of repair anyway, so the spray painted seats didn't deter me.  I got all three chairs for $25!!  Amazing!

BEFORE  PHOTOS:


So this is one of my current projects. First I removed the rush seats.  I am currently using white chalk paint to re-paint the wood chair frame.  I am giving the dark wax a second try on these chairs, to give them an antique appearance.  Once one chair is finished, I will update with more photos.  We are on our way to having a full set of 6 chairs for our dining room table.


Other exciting Redwoodshire news fit to print:  The first step of updating our dining room is happening this morning.  We sold the wood stove that is currently taking up too much space, and it is getting picked up today!  YAY- this makes me so excited.  We sold it on craigslist- the buyer is coming from over an hour away.  He got a good deal on it- which I don't mind considering I have gotten so many good deals through craigslist recently.  Spread the Joy of great deals!  August was a great month for Craiglist finds at Redwoodshire.  I will have to post about that next time.

Tuesday, September 8, 2015

"TOO MANY TOYS!" The TOY LIBRARY


Most parents can attest to the reality that along with children- come toys.  First all the baby gear and then toys, and then even more toys.  Babies become children so quickly.  And with every age, you need different toys to stimulate, entertain and teach them.  Before you know it, your house is FULL of toys.  And it's often a mess. There is a book called, "Too Many Toys" written by David Shannon.  I enjoy it because the mother in the story reminds me of myself- though we don't really have "too many toys" yet. Children really only stay interested in each toy for a few months at most, and then they
move onto a different toy.  And these changes are all part of learning and growing- which is the exact inspiration and theme of why I started this blog in the first place.  "Learning to Grow, Growing to Learn".

Recently I learned about the Toy Library here in Rochester, NY.  We have been visiting our local library on a weekly basis ever since lady genevieve turned 1 year old.  We love the story time on Wednesday mornings, geared toward toddlers.  Miss Kathy, one of the children's librarians is wonderful.  She knows lady genevieve and lord Alastair by name, which makes me enjoy our time there even more.  So lady genevieve has a little friend named Esther and her grandmother told us about the Toy Library at the Lincoln Branch library in the city.
So what is the Toy Library?  A place to check out and borrow toys!  The Toy Library at the Lincoln Branch exceeded my expectations.  There are so many toys.  There are many toys intended for play while visiting the Toy Library, and even more to check out and take home for up to 3 weeks.  Each child is allowed to check out up to 9 toys at a time.  At the entrance, there are themed activity backpacks that come with a bag of books related to that particular theme.  Our first visit, we picked up the Farm themed backpack & books.  There were puzzles, farm animal figures, a magnetic activity board, stamps, lincoln log farm, block puzzles and more.  This week we picked out a wooden alphabet puzzle, a magnetic dress up doll, zoo animal figures and picture plates.  We were there for a hour and a half, and I am not sure where the time went.

I have been thinking about doing a post about the Lincoln Toy Library since our first visit a few weeks ago.  There is not a lot of information that I could find online or photos to show what it looks like.  Though when I first started looking into it, I found that it is a national movement and there are TOY LIBRARIES all across the country.  I found this Toy Library history about the Lincoln Branch today.  If you are local and have children, I highly encourage you to visit the Toy Library.  I am so impressed and so grateful for this wonderful resource that is 100% free to us.  It is and will continue to be a place we visit monthly.


Wednesday, September 2, 2015

Our Anniversary Tradition- A Treasure Chest

Having just recently celebrated 5 years of marriage, I thought it appropriate to share a fun anniversary tradition that we have.   Sometime around getting married, a friend of ours, who also happens to be a wedding photographer shared with me a cool idea one couple incorporated into their wedding ceremony.  They made a time capsule and each picked out things to place in the time capsule- all of which they shared during their wedding ceremony.  They will open it at 10 or 20 years of being married- not sure which.  I loved the idea, but changed it a little to be an anniversary tradition.  I found a cute little treasure chest box at JoAnn Fabrics.  Then I stained and polyurethaned it.  I presented the idea to the Laird and he was on board.

I tend towards not wanting to accumulate material possessions- and the thought of each of us spending money on a gift for each other for our anniversary seemed a little funny, considering all things & money are shared at this point.  Though not into gifts, I think spending money on a shared experience is totally worth it.  So to simplify and remove the pressure of our anniversary we took gifts out of the equation.  Instead the goal is to think of and find a small token/ treasure that represents something from that previous year of marriage.  We give those little treasures to one another on our anniversary.  The beauty of getting to remember special parts of that particular year is awesome.  So 2 treasures go into the box each year.  In addition to sharing our little token for that year, we have fun looking through the other treasures and remembering the years past.

Here's what is in our box so far:


YEAR 1- "N" key chain w/ gratitude cards (Laird)- representing the year that I became a Nestlen.  A Monopoly house- representing our purchase of another rental property.


YEAR 2- Indiana Jones Lego figure (Laird) & "Oh the Places You Will Go" tiny book cover (me)- both were for our trip to Peru & Hike to Machu Picchu.


YEAR 3- Little baby girl monkey figure (Laird) & "Little Miss Chatterbox" book (me)- both to represent lady genevieve entering our lives.


YEAR 4-  Print of a Dawn Redwood Tree (Laird)- the purchase and beginning of Redwoodshire & a bottle of various seeds that we used to plant our first garden at Redwoodshire (me).


YEAR 5-  A small Lego arrow (Laird)- representing the birth of our son.  "Blessed is the man whose quiver is full of them.  They will not be put to shame when they contend with their opponents in court." Psalm 127:5.  A mini "Tale of Two Berries"book (me).  (Little Lego arrow is still at the nephew's house;))


The longer we are married, the more the years tend to blend together.  It's difficult to remember when things actually happen in your life.  I absolutely love this tradition, and look forward to sharing the treasure box memories with lady genevieve and lord alastair as they are old enough to understand.


Friday, August 28, 2015

"Old Laird Nestlen had a BARN, E-I-E-I-O"

Redwoodshire is very lucky to have a very cool old barn.  Just one of the things that we love about this place.  Having previously lived in the city, without a garage and a very small yard- we were so excited to not only get a garage to cars and storage, but to also get this beautiful old barn.  Little did we know how much we would need a barn.   Since we burn wood for heat during the winter, we use the upper part of the barn to store our wood.  The lower level of the barn houses our lawn tractor, canoe and other various things that need to be organized.  I vow that our barn is not going to become a junk collector or storage house!  The barn is very old and does need some repairs to the wood.  We bought a 1 gallon can of a form of red paint last summer in order to paint the piece of wood that the gutter was attached to.  No only does the paint serve to make the barn look great, it also protects and preserves the wood from further weather damage.  Last Saturday we decided to get as far as we could with our sole can of paint.  Lady genevieve even got involved and helped paint- and thankfully only a little bit of paint actually landed on the stone foundation!

We started with the Northern side of the barn because it is in the best shape and does not need much in way of repairs.  This is also the view of the barn we see every time we come down the driveway on our way to the garage.


And there you have it!  One can of paint got us this far.  This week I went back to Lowes and picked up a 5 gallon bucket of this same red paint- which is a much better deal than buying it by the gallon.  Doesn't it look sharp?!  Though I kind of like the look of the faded and weathered wood and would be content not painting the barn- I think it looks wonderful painted (or partially so).  The new paint contrasts with the stone foundation- making it stand out and look awesome.  Soon we'll need to hang my Barn Star on this side of the barn.  We'll see how much painting we can get done this weekend!


Thursday, August 13, 2015

Another amazing Craigslist purchase- antique hutch & pantry cabinet


I am always on the lookout for furniture that we want on Craigslist.com.  And sure enough, in 2 weeks, I found some more great deals on things that were exactly what we had wanted for our dining room and kitchen.  Our dining room renovation is the next big project we will do on the house.  We're projecting that maybe it will happen this winter.  In the mean time, I have kept my eyes open for  furniture for that room.  It actually started with looking for a bookshelf for lady genevieve's big girl room.  In the last couple on months, little lord Alastair was added to our family.  This means many changes for lady genevieve.  She will move into a big girl bed, in her new big girl room- making space for little lord Alastair in the crib.  Last week, I found a little cabinet with inset doors that seemed like a great place to store books and toys for lady genevieve's new big girl bedroom.  Once I brought it home, and it happened to fit perfectly in the space we had hoped to find a pantry for our kitchen- the Laird persuaded me to let the kitchen be it's new home.  And so we have a new little pantry in the kitchen.  Though it is not an antique, it is of similar style to the that primitive cabinet primitive cabinet we re-finished earlier this year.


This past weekend, I found my favorite piece so far!  This antique hutch listed on craigslist.com caught my eye, so I contacted to seller right away.  The price had been even reduced, prior to my discovery 


The seller needed to make space in her cozy little dining room, so she sold this to me for a mere $225 (dropped from $275)!  It's absolutely gorgeous and unique.  I can hardly believe we got so lucky.   Having been to various antique shops, this price was clearly a steal! Open shelving.  An amazing original lock & key.  Heavy duty drawer pulls.  Great detail in the woodwork.  This hutch will be quite a motivator and encouragement for the laird and I to get that dining room renovated!